compatibility equals productivity
utomated measurement and inspection have become pervasive across manufacturing segments. Driven by Industry 4.0, concepts like maintaining digital continuity throughout the manufacturing process (and beyond) and cyber-physical interoperability, customers want more data and better traceability. As a result, tolerances for fabricated parts are tightening and 100-percent inspection requirements are not uncommon.
Automated measurement, inspection and reporting allows shops to respond effectively. Measurement technology also provides a double-edged benefit for shops. Using software, those same measurement tools originally designed to inspect parts are providing efficiency and productivity multipliers in the quality lab, on the shop floor and in the field.
Measurement software like Verisurf, which is built on a CAD platform with true 3D modeling capabilities, is being deployed on a manufacturing enterprise level for various applications:
- Automated inspection and reporting, using fixed and portable CNC CMMs, arms, scanners and laser trackers
- Scanning and reverse engineering to aid in the design process or capture missing features necessary for fabrication
- Tool building applications to help design and assemble, work holding and check fixtures, layup mold tooling, and more
- Assembly guidance, including soft templates, assembly positioning, guidance for weldments and fastener placements
Verisurf software uses model-based definition (MBD) to drive each application. The central concept behind MBD is the digital model contains all the information necessary to produce and reproduce a part. This includes everything from design and manufacturing to quality inspection. Today, most CAD design is done in 3D; using an MBD strategy, the 3D CAD model will continue to have geometric dimensioning and tolerancing (GD&T) value added to it throughout the design, manufacturing and inspection processes. In the end, the MBD CAD model will be the design authority, containing all data necessary to reproduce and inspect the part for current and future builds. Essentially, the MBD CAD model becomes a virtual golden part.

The rapid adoption of measurement solutions over the past several years, especially with portable CMMs, has led to metrology bottlenecks and resource utilization challenges within many quality teams. The good news is that in-process measurement and inspection has drawn some metrology applications out of the quality lab onto the shop floor, which improves efficiency. However, the ever-increasing demand to do more can stretch resources to the brink, driving quality managers to rethink processes, equipment and software applications.

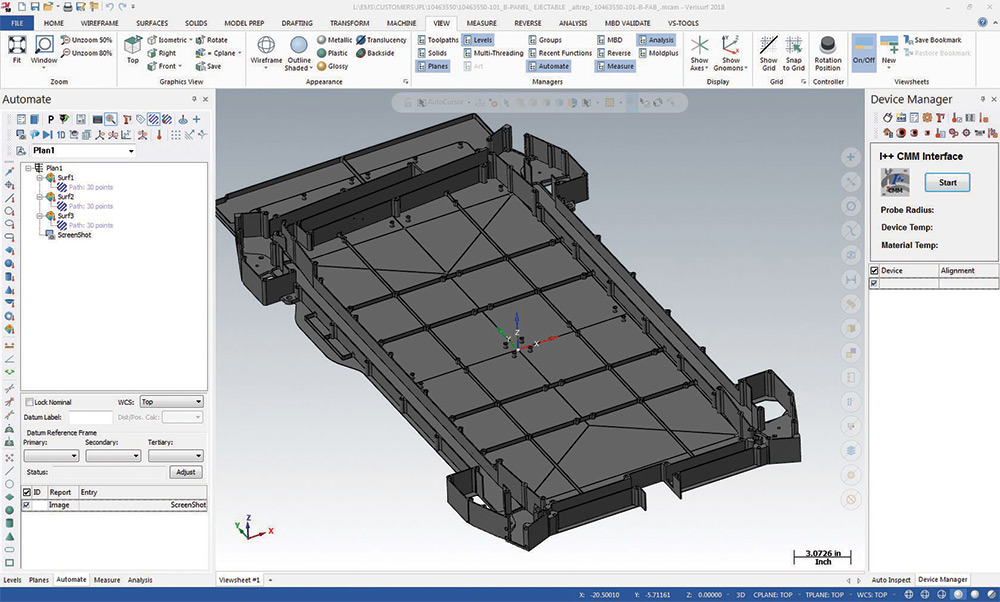
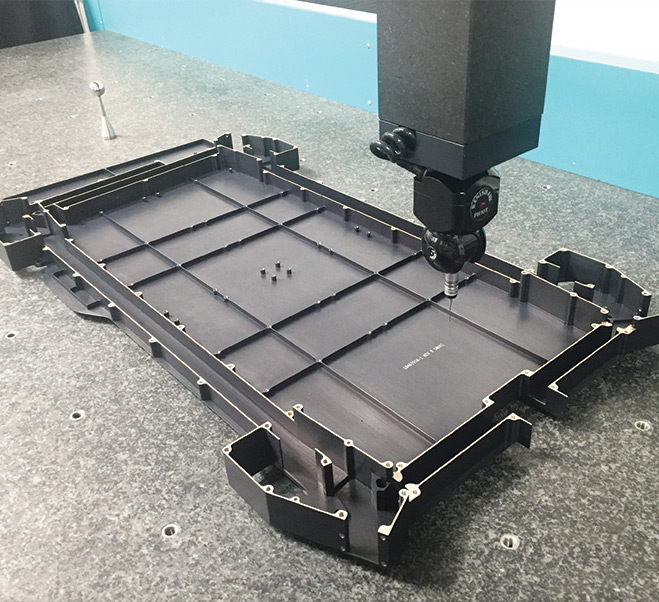
Above left: Verisurf model-based inspection software allows EMS to quickly program each of its CNC CMMs using a consistent interface, tool set and visual cues. Above right: Verisurf automatic part inspection running a legacy Wenzel CNC CMM.
Top: Verisurf model-based inspection software allows EMS to quickly program each of its CNC CMMs using a consistent interface, tool set and visual cues. Bottom: Verisurf automatic part inspection running a legacy Wenzel CNC CMM.
Most portable CMMs are compatible with all measurement and inspection software; they are convenient and versatile but are not as accurate as the fixed CNC CMM workhorses that are also able to run automatic inspection routines. The problem with many legacy CNC CMMs is they are not an open platform when it comes to compatibility. The software and controllers do not support I++ protocol for open standards. Shops that run different types of measurement devices also use more than one measurement and inspection software, which requires:
- Tribal knowledge of legacy software, usually with dedicated operators for specific CMM types
- Multiple software licenses and annual maintenance agreements
- Added training costs for multiple types of software
- Added complexity to database management
- Resource management challenges that limit a manager’s flexibility to assign resources
Verisurf software combines its CAD-based interoperability with a software-only solution, called Universal CMM, to bridge legacy CMMs. This gives shops the ability to run a single measurement and inspection software to drive all their hardware devices across the manufacturing enterprise—one software, with a common interface—and everyone on the quality team is trained to use it.

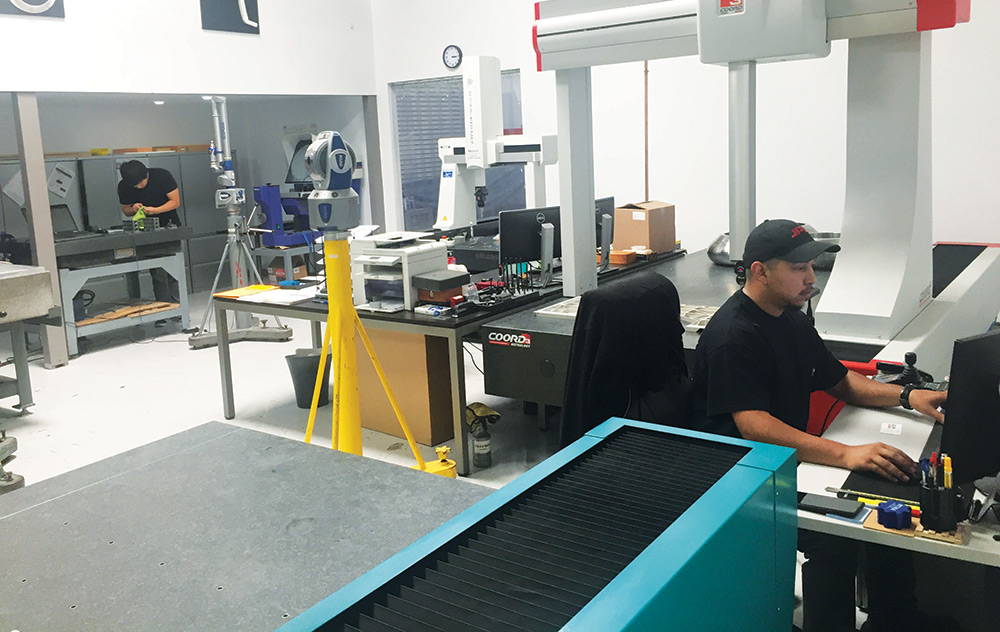
The Mitutoyo, Wenzel and Coord3 programmable CNC CMMs are all driven by Verisurf software, which reduces training costs while improving consistency in the inspection and reporting process.
EMS is a machining and fabrication shop that was running two legacy CNC CMMs, a Mitutoyo and a Wenzel, that were operated by different measurement and inspection software and controllers. The CMMs did not support the open I++ protocol to facilitate integration. Verisurf Universal CMM software provided the company with an open standard communications bridge, allowing it to continue using the legacy CMMs while achieving consistency of interface, operation and reporting.
By incorporating the Verisurf CAD-based metrology platform across its manufacturing enterprise, EMS can choose the right measuring device for each job, while realizing increased efficiency and reduced training, data management and support costs. Since standardizing on the Verisurf software platform, EMS seamlessly added a Coord3 CNC CMM, two Faro portable CMMs, a Faro scanner and laser tracker.